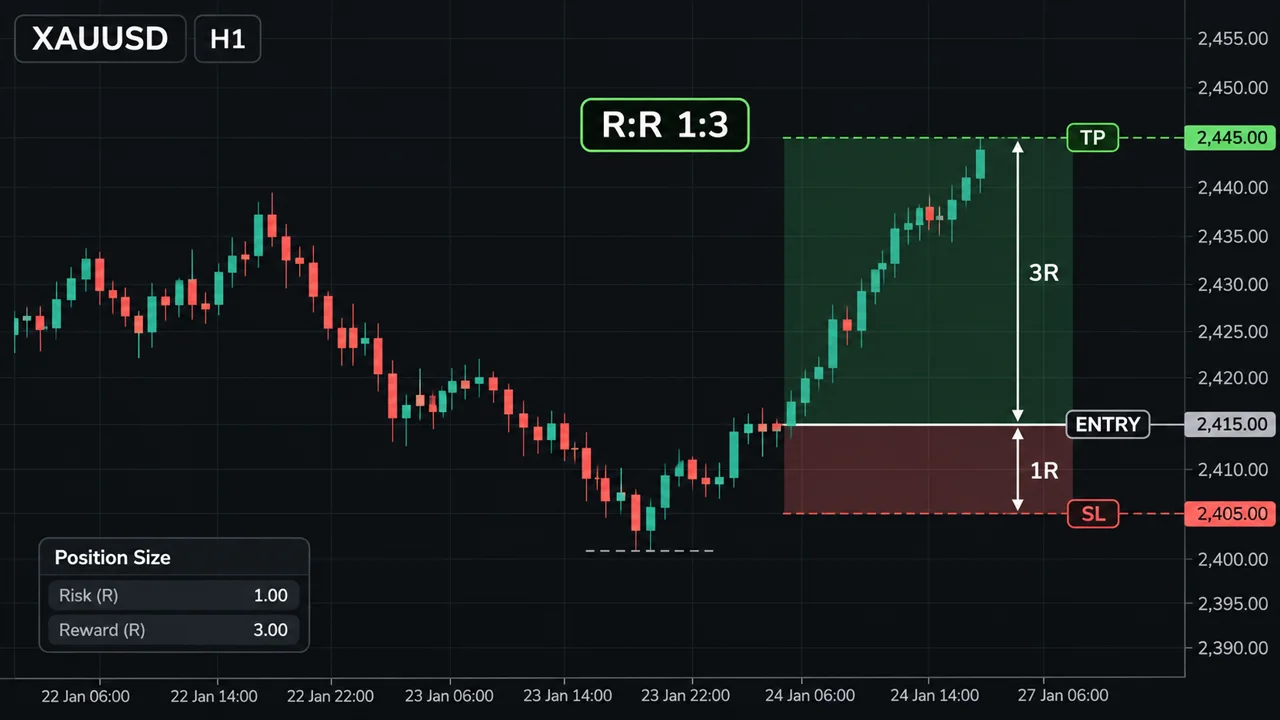
แนวรับแนวต้าน (Support & Resistance)Support and Resistance
เข้าใจว่าแนวรับแนวต้านเกิดจากอะไร วาดเป็นโซนอย่างไร และใช้วาง Entry, SL, TP ให้มีเหตุผลLearn why support and resistance form, how to draw them as zones, and how to use them for entries, stops and targets.
ในบทความนี้ · 7
In this article · 7
แนวรับ (Support) และแนวต้าน (Resistance) คือเครื่องมือพื้นฐานที่สุดของการอ่านกราฟแบบ Price Action แทบทุกกลยุทธ์ ไม่ว่าจะเป็นเทรดตามเทรนด์ เทรดกรอบ หรือเทรดเบรกเอาต์ ล้วนเริ่มจากคำถามเดียวกันว่า "ราคาเคยหยุดหรือกลับตัวที่ไหน" ถ้าคุณวาดแนวรับแนวต้านได้อย่างมีเหตุผล การวางจุดเข้า จุดตัดขาดทุน และจุดทำกำไรจะง่ายขึ้นมาก
แนวรับแนวต้านคืออะไร
แนวรับ คือบริเวณราคาด้านล่างที่ในอดีตมีแรงซื้อมากพอจะหยุดการลงของราคา แนวต้าน คือบริเวณราคาด้านบนที่ในอดีตมีแรงขายมากพอจะหยุดการขึ้น
เหตุผลที่ราคามักตอบสนองกับระดับเดิมซ้ำ ๆ มาจากพฤติกรรมคน เช่น
- คนที่ซื้อไม่ทันที่แนวรับครั้งก่อน มักรอซื้อเมื่อราคากลับมาที่เดิม
- คนที่ติดขาดทุนจากการซื้อที่แนวต้าน มักอยากขายคืนเมื่อราคากลับมาเท่าทุน
- ออเดอร์รอ (Pending Order) และจุดตัดขาดทุนของคนจำนวนมากมักกองอยู่ใกล้ระดับที่เห็นชัดบนกราฟ
ดังนั้นแนวรับแนวต้านไม่ใช่เส้นวิเศษ แต่เป็นบริเวณที่ "มีโอกาส" เกิดการตัดสินใจของผู้เล่นจำนวนมาก ราคาอาจเด้ง อาจทะลุ หรืออาจแกว่งอยู่ตรงนั้นก็ได้
วาดเป็นโซน ไม่ใช่เส้นเดียว
มือใหม่มักลากเส้นบาง ๆ เส้นเดียวที่ราคาปิดพอดี แต่ในความจริงราคาจะเลยไปบ้าง ขาดไปบ้าง วิธีที่ใช้งานได้จริงกว่าคือวาดเป็น โซน (Zone) ที่ครอบทั้งไส้เทียน (Wick) และตัวเทียน (Body) บริเวณที่ราคากลับตัว
ขั้นตอนวาดโซนแบบง่าย
- เปิดกราฟไทม์เฟรมใหญ่ก่อน เช่น H4 หรือ D1 แล้วซูมออกให้เห็นราคาย้อนหลังพอสมควร
- หาจุดที่ราคากลับตัวชัด ๆ อย่างน้อย 2 ครั้งในระดับใกล้กัน
- ลากกรอบสี่เหลี่ยมจากปลายไส้เทียนถึงจุดปิดของแท่งที่กลับตัว
- ถ้าโซนกว้างเกินไปจนใช้วาง SL ไม่ได้ ให้ลดลงไปดูไทม์เฟรมเล็กลงเพื่อหาจุดที่แคบกว่า
- เก็บไว้แค่ 3–5 โซนที่ใกล้ราคาปัจจุบันที่สุด ลบโซนที่ไกลหรือไม่สำคัญทิ้ง
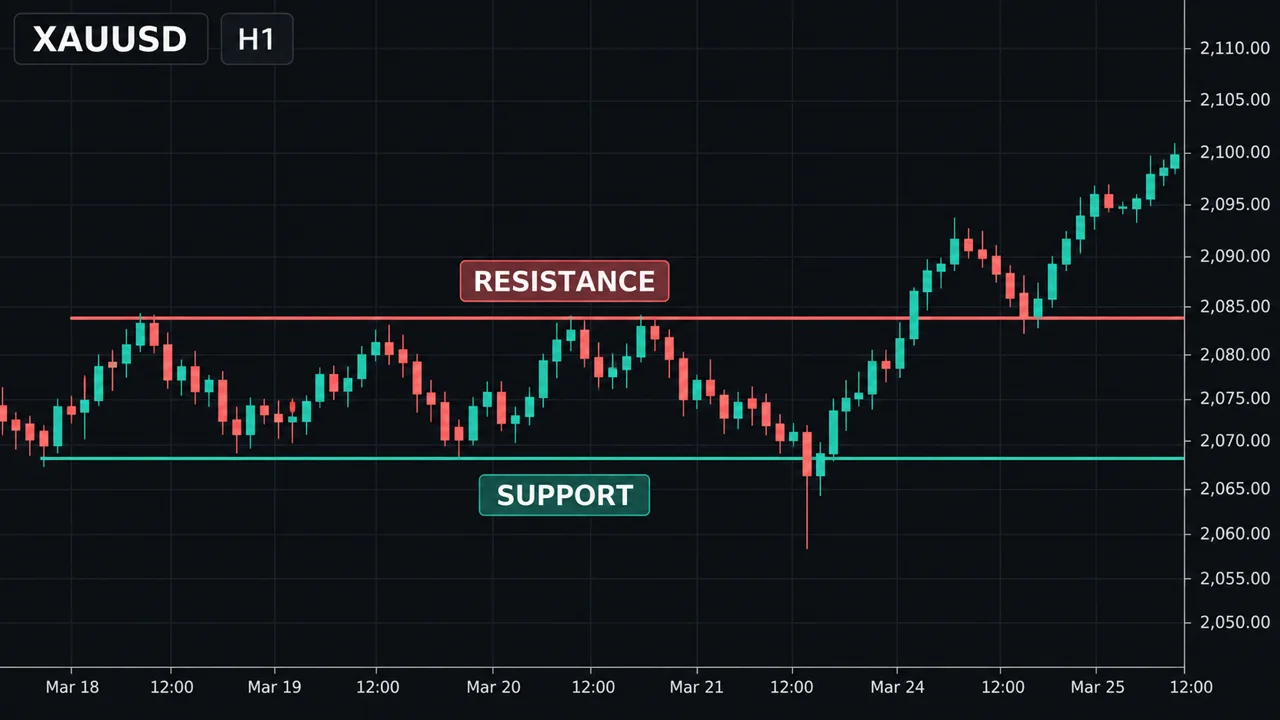
ดูภาพด้านล่าง เส้นเดียวโดนไส้เทียนแทงทะลุบ่อย แต่โซนครอบไว้ได้หมด
โซนที่ราคาเคยกลับตัวแรงและเร็ว อยู่บนไทม์เฟรมใหญ่ และตรงกับเลขกลม เช่น 1.1000 หรือ 2,000 มักถูกคนจำนวนมากมองเห็น จึงมีน้ำหนักมากกว่าโซนที่เกิดบน M5 ครั้งเดียว
การสลับบทบาท (Role Reversal)
เมื่อแนวต้านถูกทะลุขึ้นไปอย่างชัดเจน มันมักกลายเป็นแนวรับใหม่ และกลับกัน แนวรับที่ถูกทะลุลงมาก็มักกลายเป็นแนวต้าน หลักนี้คือพื้นฐานของการเทรดแบบ เบรกแล้วรีเทสต์ เพราะคนที่พลาดรอบแรกจะกลับมาซื้อขายที่ระดับเดิม
ใช้แนวรับแนวต้านเทรดอย่างไร
มีวิธีใช้หลัก ๆ 3 แบบ
- เด้งจากโซน (Bounce) ซื้อใกล้แนวรับ ขายใกล้แนวต้าน เหมาะกับตลาดที่แกว่งในกรอบหรือย่อในเทรนด์
- เบรกเอาต์ (Breakout) รอให้ราคาปิดทะลุโซน แล้วเทรดตามทิศที่ทะลุ
- ใช้เป็นจุดอ้างอิง แม้เข้าด้วยเหตุผลอื่น ก็ใช้โซนเป็นที่วาง SL (เลยโซนออกไป) และ TP (ก่อนถึงโซนถัดไป)
การวาง SL ที่ดีคือวาง "ด้านนอกโซน" พร้อมเผื่อระยะสเปรดและความผันผวน ไม่ใช่วางชิดขอบโซนพอดี อ่านเพิ่มที่ การวางจุดตัดขาดทุน
สมมติบัญชี $3,000 ยอมเสียได้ 1.5% ต่อไม้ = $45 โซนแนวรับ XAUUSD อยู่ที่ 1,950–1,953 แนวต้านถัดไปอยู่ที่ 1,975 ราคาลงมาแตะโซนแล้วมีแท่งกลับตัว คุณเข้าซื้อที่ 1,955 วาง SL ใต้โซนเผื่อระยะไว้ที่ 1,946 = ระยะ 9 ดอลลาร์ ทอง 0.01 ล็อต ขยับ $1 = $1 ดังนั้นต้องการเสีย $45 ที่ระยะ 9 → ล็อต = 45 ÷ (9 × 100) = 0.05 ตรวจสอบ: 0.05 ล็อต × 9 ดอลลาร์ × 100 = $45 ถูกต้อง TP ก่อนถึงแนวต้านที่ 1,975 = ระยะ 20 ดอลลาร์ → กำไรถ้าถึงเป้า 0.05 × 20 × 100 = $100 อัตราส่วน Risk:Reward = 20 ÷ 9 ≈ 1 : 2.2
ดูภาพด้านล่าง ตัวอย่างนี้วาดเป็นกราฟ
จุดอ่อน / ข้อผิดพลาดที่พบบ่อย
- ลากเส้นมากเกินไป จนทุกราคามีแนวรับแนวต้าน สุดท้ายมองอะไรก็เห็นเหตุผลเข้าเทรด ควรเลือกเฉพาะโซนที่ชัดจริง
- คิดว่าโซนต้องเด้งเสมอ โซนยิ่งถูกทดสอบบ่อย แรงซื้อขายที่รออยู่ยิ่งถูกใช้หมดไป บางครั้งการแตะหลายครั้งคือสัญญาณว่ากำลังจะทะลุ
- วาง SL ชิดโซนเกินไป ราคามักแทงเลยโซนเล็กน้อยก่อนกลับตัว ทำให้โดนตัดแล้วราคาไปทางที่คิด ดู เบรกหลอก
- ใช้โซนจากไทม์เฟรมเล็กอย่างเดียว โซนบน M5 อาจหายไปในพริบตาเมื่อมีข่าว
- ไม่ดูบริบทเทรนด์ ซื้อที่แนวรับในขาลงแรง ๆ คือการเทรดสวนแรงตลาด โอกาสพลาดสูงขึ้น ดู โครงสร้างราคา
- แนวรับแนวต้านเป็นเรื่องของความน่าจะเป็น ไม่มีโซนไหนรับประกันผลได้
ใช้บนมือถือ
บน MT4/MT5 มือถือ ใช้เครื่องมือ Rectangle หรือ Horizontal Line วาดบนไทม์เฟรมใหญ่ก่อน แล้วค่อยสลับไปไทม์เฟรมเล็ก เส้นจะยังอยู่ หมุนจอเป็นแนวนอนเพื่อเห็นราคาย้อนหลังมากขึ้น และตั้งการแจ้งเตือนราคา (Price Alert) ไว้ที่ขอบโซน จะได้ไม่ต้องจ้องจอทั้งวัน
สรุป
- แนวรับแนวต้านคือบริเวณที่เคยมีการตัดสินใจของคนจำนวนมาก ไม่ใช่เส้นที่ราคาต้องเคารพ
- วาดเป็นโซนจากไทม์เฟรมใหญ่ เลือกเฉพาะที่ชัดและใกล้ราคา
- แนวต้านที่ถูกทะลุมักกลายเป็นแนวรับ (และกลับกัน)
- วาง SL นอกโซนพร้อมเผื่อระยะ วาง TP ก่อนถึงโซนถัดไป
- คำนวณล็อตจากระยะ SL เสมอ ไม่ใช่เลือกล็อตก่อนแล้วค่อยหาที่วาง SL
Support and resistance are the foundation of price action trading. Whether you trade trends, ranges or breakouts, almost every approach starts with the same question: where has price stopped or turned before? If you can draw these areas with a clear reason, choosing your entry, stop loss and take profit becomes much more logical.
What support and resistance are
Support is an area below the current price where buying pressure was strong enough in the past to stop a decline. Resistance is an area above price where selling pressure was strong enough to stop a rally.
Price tends to react at old levels because of how people behave:
- Traders who missed the last bounce from support often wait to buy if price returns there.
- Traders who bought at resistance and sat in a loss often sell to get out at break-even when price comes back.
- Pending orders and stop losses from many traders tend to cluster around levels that are obvious on the chart.
So support and resistance are not magic lines. They are areas where many participants are likely to make decisions. Price can bounce, break through, or chop around them.
Draw zones, not single lines
Beginners often draw one thin line at an exact price. In reality price overshoots and undershoots. A more practical approach is to draw a zone that covers both the wicks and the bodies where price turned.
A simple way to draw a zone:
- Start on a higher timeframe such as H4 or D1, zoomed out enough to see plenty of history.
- Find places where price turned clearly at least twice near the same level.
- Draw a rectangle from the wick tips to the closes of the reversal candles.
- If the zone is too wide to place a sensible stop, drop to a lower timeframe to find a tighter area.
- Keep only the 3–5 zones closest to current price and delete the rest.
See the chart below: a single line gets pierced by wicks again and again, while the zone covers them all.
Zones where price turned sharply, that sit on higher timeframes and line up with round numbers such as 1.1000 or 2,000, are visible to many traders and usually carry more weight than a zone that appeared once on M5.
Role reversal
When resistance is broken decisively, it often becomes new support, and broken support often becomes resistance. This idea is the basis of the breakout and retest approach, because traders who missed the first move come back to trade the same level.
How traders use support and resistance
There are three main uses:
- Bounce — buy near support, sell near resistance. Suits ranging markets or pullbacks within a trend.
- Breakout — wait for a close through the zone, then trade in the direction of the break.
- Reference points — even if you enter for another reason, use zones to place the stop (beyond the zone) and the target (before the next zone).
A good stop sits outside the zone with extra room for spread and normal volatility, not right on the edge. More in stop-loss placement.
Suppose a $3,000 account risks 1.5% per trade = $45. A XAUUSD support zone sits at 1,950–1,953, with the next resistance at 1,975. Price drops into the zone and prints a reversal candle. You buy at 1,955. Stop goes below the zone with a buffer at 1,946 = a $9 distance. For gold, 0.01 lot = $1 per $1 move, so to risk $45 over $9: lot = 45 ÷ (9 × 100) = 0.05 Check: 0.05 lot × $9 × 100 = $45. Correct. Target just below resistance at 1,975 = $20 distance → profit at target 0.05 × 20 × 100 = $100. Risk:reward = 20 ÷ 9 ≈ 1 : 2.2
See the chart below: the same example drawn out.
Weaknesses and common mistakes
- Too many lines. If every price has a level, you will always find a reason to trade. Keep only the clear zones.
- Assuming zones always hold. Each test uses up some of the orders waiting there. Repeated touches can be a sign a break is coming.
- Stops too tight to the zone. Price often pokes slightly past a zone before turning, stopping you out right before the move. See false breakouts.
- Using only lower-timeframe zones. An M5 level can vanish in seconds on a news release.
- Ignoring trend context. Buying support in a strong downtrend means fighting the market. See market structure.
- Support and resistance are about probability. No zone guarantees an outcome.
On a phone
In MT4/MT5 mobile, use the Rectangle or Horizontal Line tool on a higher timeframe first, then switch down; the drawings stay. Rotate the screen to landscape to see more history, and set price alerts at zone edges so you don't have to watch the chart all day.
Summary
- Support and resistance are areas where many traders made decisions before, not lines price must obey.
- Draw zones from higher timeframes and keep only clear ones near price.
- Broken resistance often becomes support, and vice versa.
- Place stops outside the zone with a buffer; place targets before the next zone.
- Size your lot from the stop distance, never pick the lot first.