ใช้อินดิเคเตอร์ร่วมกันอย่างไรไม่ให้ซ้ำซ้อนCombining Indicators
แบ่งอินดิเคเตอร์เป็น 4 กลุ่ม เลือกตัวที่ให้ข้อมูลต่างกัน สร้างชุดกฎ เทรนด์ + จังหวะ + ความเสี่ยง และหลีกเลี่ยงกราฟรกที่ทำให้ตัดสินใจแย่ลงSort indicators into four families, pick tools that add different information, build a trend + timing + risk rule set, and avoid cluttered charts that worsen decisions.
ในบทความนี้ · 7
In this article · 7
มือใหม่หลายคนเชื่อว่า "ยิ่งใส่อินดี้เยอะ ยิ่งแม่น" จึงเปิด RSI, Stochastic, MACD, CCI และเส้นค่าเฉลี่ยอีก 5 เส้นบนกราฟเดียว ผลคือกราฟรกจนมองไม่เห็นราคา และได้สัญญาณขัดกันตลอด ทางที่ดีกว่าคือเลือกน้อยตัว แต่แต่ละตัวทำหน้าที่ต่างกันชัดเจน บทความนี้รวบรวมหลักคิดจากอินดี้ทั้งหมวด มาประกอบเป็นชุดกฎที่ใช้งานได้จริง
อินดิเคเตอร์แบ่งเป็น 4 กลุ่ม
| กลุ่ม | ตอบคำถาม | ตัวอย่าง |
|---|---|---|
| เทรนด์ (Trend) | ไปทางไหน | MA, Ichimoku, Parabolic SAR, ADX |
| โมเมนตัม (Momentum) | แรงแค่ไหน ยืดเกินไหม | RSI, Stochastic, MACD, CCI |
| ความผันผวน (Volatility) | แกว่งกว้างแค่ไหน | ATR, Bollinger Bands |
| ปริมาณ (Volume) | คนร่วมมากแค่ไหน | Volumes, OBV, MFI, VWAP |
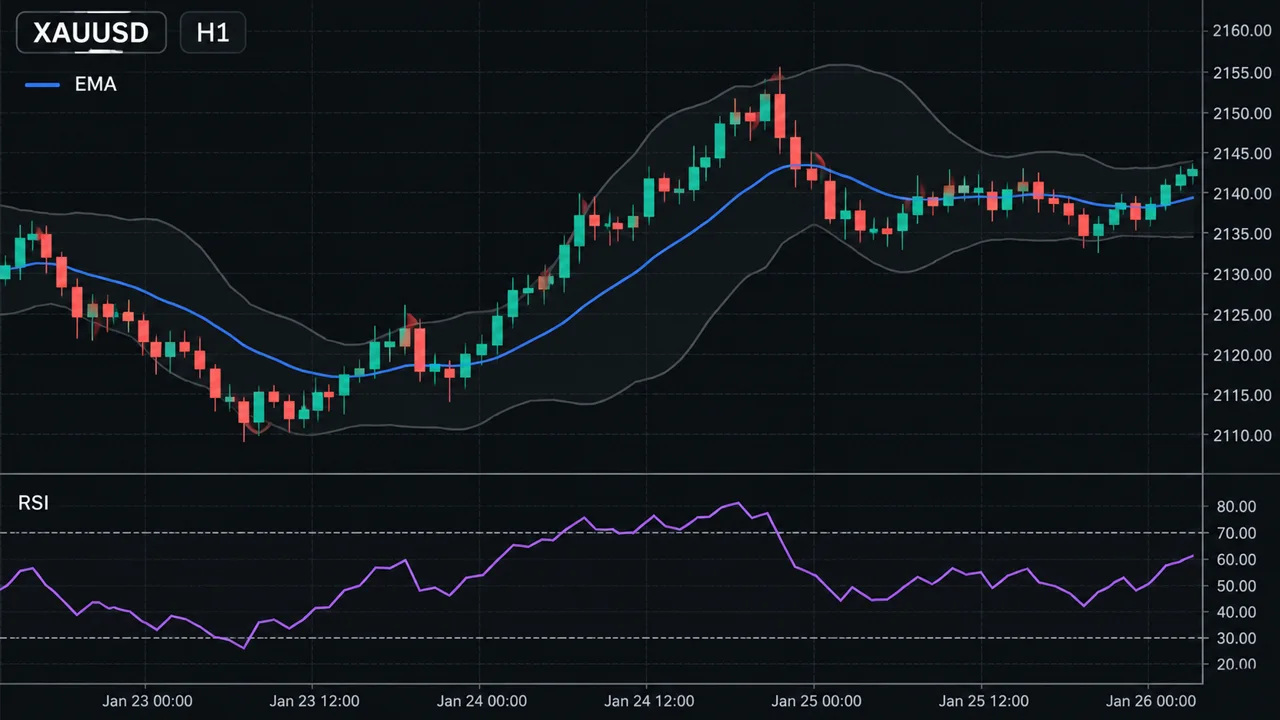
อินดี้ในกลุ่มเดียวกันมักคำนวณจากข้อมูลชุดเดียวกัน (ราคาปิดย้อนหลัง) ด้วยวิธีคล้ายกัน มันจึง ขึ้นลงพร้อมกัน การที่ RSI และ Stochastic เข้า Oversold พร้อมกันจึงไม่ใช่ "การยืนยันสองชั้น" แต่เป็นข้อมูลเดียวกันที่ถูกวาดสองครั้ง ดูภาพด้านล่าง
หลักการเลือกชุดอินดี้
- หนึ่งงาน หนึ่งเครื่องมือ — เลือกตัวหนึ่งสำหรับเทรนด์ ตัวหนึ่งสำหรับจังหวะ ตัวหนึ่งสำหรับวาง SL/ขนาดไม้ รวม 2–3 ตัวก็เพียงพอ
- ราคามาก่อน — อินดี้ทุกตัวสร้างจากราคา ให้แนวรับแนวต้านและโครงสร้างตลาดเป็นฐาน แล้วใช้อินดี้เป็นตัวช่วยกรอง ดู โครงสร้างตลาด
- กำหนดบทบาทในกรอบเวลา — เช่น ดูเทรนด์บน H4 จับจังหวะบน H1 ดู การวิเคราะห์หลายกรอบเวลา
- เขียนเป็นกฎที่ตรวจได้ — "RSI ต่ำ" ไม่ใช่กฎ "RSI 14 ตัดกลับขึ้นเหนือ 40 ขณะราคาอยู่เหนือ EMA 200" คือกฎ
- ใช้ค่ามาตรฐานก่อน — อย่าเริ่มด้วยการปรับค่าทุกตัว เพราะจะเกิด Overfitting ได้ง่ายมาก
ตัวอย่างชุดกฎ: เทรนด์ + จังหวะ + ความเสี่ยง
- เทรนด์: ราคาอยู่เหนือ EMA 200 → เน้นซื้อ
- จังหวะ: RSI 14 ย่อลงแถว 40–50 แล้วหันกลับขึ้น พร้อมแท่งปิดเหนือ High ของแท่งก่อน
- ความเสี่ยง: SL = 1.5 × ATR 14 ขนาดไม้คำนวณจากความเสี่ยง 1% ต่อไม้
- ออก: ที่ 2 เท่าของความเสี่ยง หรือเมื่อราคาปิดใต้ EMA 50
สามตัวนี้มาจากสามกลุ่มต่างกัน แต่ละตัวตอบคำถามที่อีกตัวตอบไม่ได้ นี่คือเหตุผลที่การรวมกันมีประโยชน์ ไม่ใช่เพราะจำนวน
ราคาอยู่เหนือ EMA 200 RSI ย่อมา 43 แล้วหันขึ้น ATR 14 (H1) = 15 pips SL = 1.5 × 15 = 22.5 → ปัดเป็น 23 pips บัญชี $5,000 ความเสี่ยง 1% = $50 → ล็อต = 50 ÷ (23 × $10) = 0.217 → ปัดลงเป็น 0.21 ล็อต ความเสี่ยงจริง = 23 × $10 × 0.21 = $48.30 เป้า 2 เท่า = 46 pips → 46 × $10 × 0.21 = $96.60
วิธีทดสอบว่าการเพิ่มอินดี้ช่วยจริงไหม
- เริ่มจากกฎพื้นฐาน (เช่น แค่เทรนด์ + โครงสร้างราคา) แล้วจดผลการทดสอบ
- เพิ่มตัวกรองทีละหนึ่งตัว แล้วดูว่าจำนวนไม้ลดลงเท่าไร และผลโดยรวมเปลี่ยนอย่างไร
- ถ้าตัวกรองตัดไม้ทิ้งไปครึ่งหนึ่งแต่ผลแทบไม่ต่าง แปลว่ามันไม่ได้เพิ่มข้อมูลใหม่
- ทดสอบในช่วงข้อมูลที่ไม่ได้ใช้ตอนตั้งกฎด้วย ดู การทดสอบย้อนหลัง
จุดอ่อน / ข้อผิดพลาดที่พบบ่อย
- ซ้ำกลุ่ม — RSI + Stochastic + CCI = โมเมนตัมสามครั้ง ให้ความมั่นใจปลอม
- ตัวกรองมากเกินไป — ยิ่งมีเงื่อนไขมาก ยิ่งแทบไม่มีไม้ให้เข้า และไม้ที่ผ่านอาจเป็นไม้ที่มาช้าที่สุด เพราะรอทุกตัวตามหลังพร้อมกัน
- เลือกอินดี้ตามผลที่อยากเห็น — เมื่อตัวหนึ่งบอกซื้ออีกตัวบอกขาย แล้วเราเชื่อตัวที่ตรงกับใจ แปลว่าไม่มีกฎจริง
- เปลี่ยนชุดอินดี้ทุกครั้งที่แพ้ — ขาดทุนติดกันเป็นเรื่องปกติของทุกระบบ การเปลี่ยนเครื่องมือทุกสัปดาห์ทำให้ไม่เคยรู้ว่าอะไรใช้ได้
- ลืมว่าทุกตัวมาจากราคา — ไม่มีชุดอินดี้ใดเห็นอนาคต การรวมหลายตัวไม่ได้เปลี่ยนความจริงข้อนี้
ถ้าต้องใช้เวลานานในการอ่านกราฟทุกครั้ง หรือมีอินดี้ที่คุณไม่เคยใช้ตัดสินใจจริงเลย ให้ถอดออก
ใช้บนมือถือ
จอโทรศัพท์มีพื้นที่น้อย ใส่บนกราฟหลักได้ 1–2 เส้น (เช่น EMA 200 และ EMA 50) และหน้าต่างอินดี้ด้านล่างได้ 1 หน้าต่าง (เช่น RSI) ATR ดูค่าแล้วจดก็พอ ไม่ต้องเปิดค้างไว้ สร้างกฎเป็นเช็กลิสต์สั้น ๆ ไว้ในโน้ตโทรศัพท์ แล้วติ๊กทีละข้อก่อนกดเข้า ถ้าอยากเปลี่ยนชุดกฎนี้เป็นโค้ดสำหรับทดสอบ ลองดู ชุดพรอมต์สำหรับเขียน EA
สรุป
- อินดี้มี 4 กลุ่ม: เทรนด์ โมเมนตัม ความผันผวน ปริมาณ
- อินดี้กลุ่มเดียวกันไม่ได้ยืนยันกัน เพราะใช้ข้อมูลเดียวกัน
- ชุดที่ดีมัก 2–3 ตัว แต่ละตัวทำงานต่างกัน: เทรนด์ จังหวะ ความเสี่ยง
- เขียนกฎให้ตรวจได้ เพิ่มตัวกรองทีละตัวพร้อมทดสอบ
- ราคาและโครงสร้างมาก่อน อินดี้เป็นตัวช่วย ไม่ใช่ตัวทำนาย
Many beginners believe more indicators mean more accuracy, so they load RSI, Stochastic, MACD, CCI and five moving averages onto one chart. The result is a chart so cluttered you can barely see price, and signals that contradict each other all the time. A better approach is fewer tools, each with a clearly different job. This article pulls together the ideas from this whole category into a rule set you can actually use.
Indicators fall into four families
| Family | Question it answers | Examples |
|---|---|---|
| Trend | Which way? | MA, Ichimoku, Parabolic SAR, ADX |
| Momentum | How strong, how stretched? | RSI, Stochastic, MACD, CCI |
| Volatility | How wide are the swings? | ATR, Bollinger Bands |
| Volume | How much participation? | Volumes, OBV, MFI, VWAP |
Indicators in the same family are usually computed from the same data (past closes) in similar ways, so they move together. RSI and Stochastic going oversold at the same moment is not double confirmation; it is the same information drawn twice. See the chart below.
Principles for choosing a set
- One job, one tool — one for trend, one for timing, one for stops/position size. Two or three in total is plenty.
- Price first — every indicator is derived from price. Make support/resistance and market structure the foundation, and use indicators as filters. See Market structure.
- Assign roles by timeframe — e.g. trend on H4, timing on H1. See Multi-timeframe analysis.
- Write rules you can check — "RSI is low" is not a rule. "RSI 14 crosses back above 40 while price is above the 200 EMA" is.
- Start with standard settings — tuning every input from day one is the fastest route to overfitting.
Example rule set: trend + timing + risk
- Trend: price above the 200 EMA → look for buys.
- Timing: RSI 14 pulls back to around 40–50 and turns up, with a candle closing above the previous candle's high.
- Risk: stop = 1.5 × ATR 14; position size from 1% risk per trade.
- Exit: at 2× the risk, or when price closes below the 50 EMA.
These three come from three different families, and each answers a question the others cannot. That is why the combination helps — not because of the count.
Price is above the 200 EMA, RSI dips to 43 and turns up. ATR 14 (H1) = 15 pips. Stop = 1.5 × 15 = 22.5 → rounded to 23 pips. Account $5,000, 1% risk = $50 → lot = 50 ÷ (23 × $10) = 0.217 → rounded down to 0.21 lot. Actual risk = 23 × $10 × 0.21 = $48.30. 2R target = 46 pips → 46 × $10 × 0.21 = $96.60.
How to test whether an extra indicator helps
- Start with base rules (e.g. trend + price structure only) and record the test results.
- Add one filter at a time and note how many trades it removes and how the overall result changes.
- If a filter cuts half the trades but the result barely changes, it is not adding new information.
- Test on data you did not use while designing the rules. See Backtesting.
Weaknesses and common mistakes
- Same-family stacking — RSI + Stochastic + CCI is momentum three times, giving false confidence.
- Too many filters — the more conditions, the fewer trades, and the ones that pass may be the latest entries, because you are waiting for several lagging tools to agree.
- Picking the indicator that agrees with you — if one says buy, another says sell, and you follow the one you like, you do not really have rules.
- Swapping the set after every loss — losing streaks are normal for any system. Changing tools every week means you never learn what works.
- Forgetting that it is all price — no combination of indicators sees the future. Stacking more of them does not change that.
If reading your chart takes a long time every time, or it carries indicators you never actually use to decide, remove them.
On a phone
A phone screen has little room. Keep one or two lines on the main chart (for example the 200 and 50 EMAs) and one indicator window below (for example RSI). For ATR, just read and note the value; it does not need to stay open. Write your rules as a short checklist in your phone's notes and tick each item before you tap Buy or Sell. If you want to turn a rule set like this into code for testing, see the EA-writing prompts.
Summary
- Indicators come in four families: trend, momentum, volatility, volume.
- Indicators from the same family do not confirm each other; they share the same data.
- A good set is usually two or three tools with different jobs: trend, timing, risk.
- Write checkable rules and add filters one at a time, with testing.
- Price and structure come first; indicators assist, they do not predict.